Dry goods sharing|Will you install Jindi starter relay?
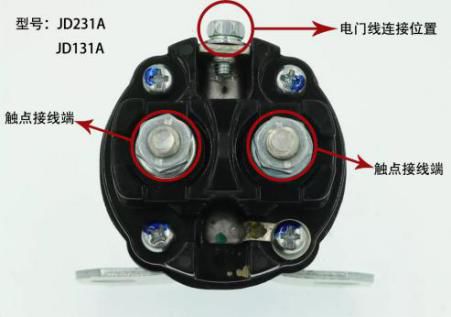
The editor recently received a private message from everyone asking how to install the Jindi starter relay. Today, I will give you a super practical tutorial and suggest that you can collect it. The main function of the slow mesh starter relay (hereinafter referred to as the "starter relay") is to The current controls the large current and cooperates with the ignition switch to control the on and off of the structure that attracts and maintains the coil current in the electromagnetic switch of the starter to protect the ignition switch from working normally. The starter relay is composed of coils and contacts (including coil contacts and main contacts). The working principle is that the coil is energized and the contacts are closed. The external basic structure of Jindi conventional starter relay includes a switch wiring position and two contact terminals (connected to the main power supply line). Jindi's special model starter relay has two different shapes of relays with socket type and double lead (referring to switch wire and ground wire) wiring position.
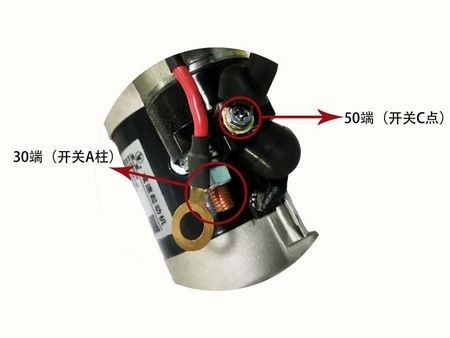
Due to the different external structure and connection points of the Jindi starter relay model, as well as the factors of adapting to the starter, it is necessary to choose a suitable relay installation method and operation to protect the starter and prolong its service life. The models of Jindi starter relays are JD210, JD211, JD231A, JD131A, JD220 (with plug), and JD213A (dual leads). Only when the matched Jindi starter relay is used can the real power of the starter be exerted. The first installation method: two-wire connection. First, we need to remove the old starter relay from the starter (the starter without a starter relay was installed before, and a golden flute starter relay and two wires need to be prepared). Secondly, the yellow wire connected to the starter relay is connected to the starter terminal 50 (switch point C), and the red wire that is also connected to the starter relay needs to be connected to the starter terminal 30 (switch A column). Finally, we need to lock the Jindi starter relay on the negative grounding position of the starter, and the installation steps are complete. Schematic diagram of starter connection point
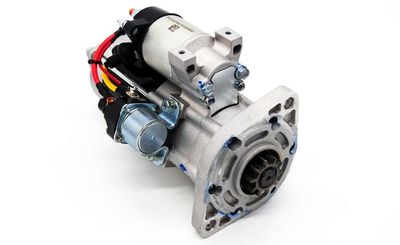
Real display of Jindi starter relay and starter wiring
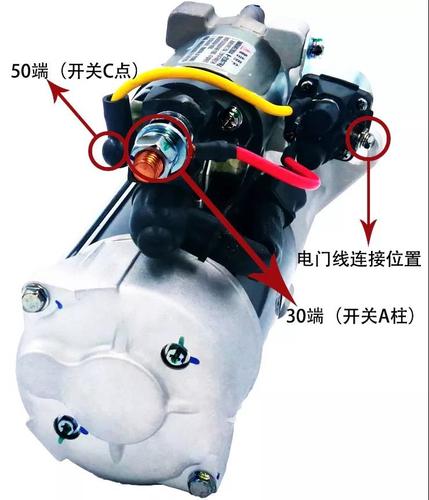
The second installation method: three-wire connection. First, we need to remove the old starter relay from the starter (the starter without a starter relay was installed before, so we needto prepare a golden flute starter relay, two wires and an electric Door line). Secondly, the yellow wire connected to the starter relay is connected to the starter terminal 50 (switch point C), and the red wire that is also connected to the starter relay needs to be connected to the starter terminal 30 (switch A column). Next, we need to connect the switch wire connected to the starter relay to the starter switch terminal. Finally, we need to lock the Jindi starter relay on the negative grounding position of the starter, and the installation steps are complete.
Schematic diagram of starter connection point
Jindi starter relay and starter connection physical display
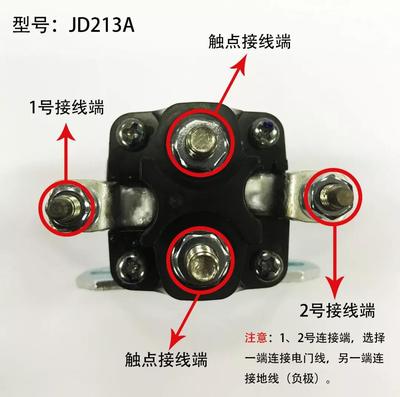
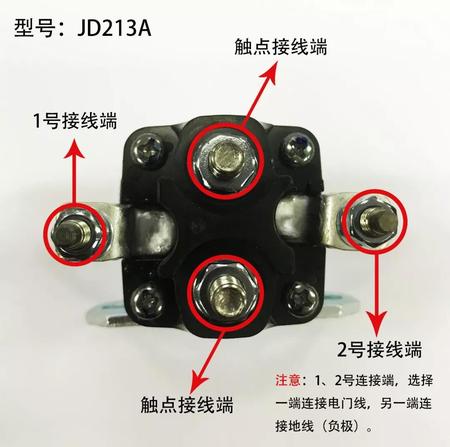
Jindi specially reminds: The JD213A type Jindi starter relay has a double lead (switch wire and ground wire) wiring position. When installing, you should first determine the position to connect the switch wire, terminal 1 and 2, choose one end to connect the switch wire and the other end to the ground wire (negative). Secondly, the yellow wire connected to the starter relay is connected to the starter terminal 50 (switch point C), and the red wire that is also connected to the starter relay needs to be connected to the starter terminal 30 (switch A column). Finally, we need to lock the Jindi starter relay on the negative grounding position of the starter, and the installation steps are complete.
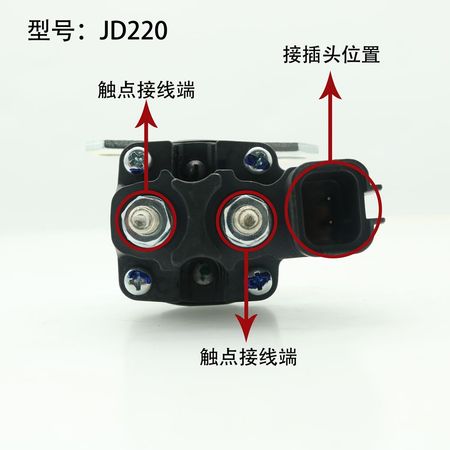
The third installation method: plug wiring The plug wiring is relatively simple. First of all, you need to prepare the golden flute starter relay with socket and the suitable wire. Secondly, connect the adapted wires to the 50 and 30 terminals on the starter. Then, the connector connecting the switch wire is directly inserted into the position of the starter relay connector. Finally, we need to lock the Jindi starter relay on the negative grounding position of the starter, and the installation steps are complete.
Socket starter relay Jindi starter relay and starter connection physical display
Reminder: The above installation requires professional operation |